
How to install a Flush Valve
18 Nov 2020


View Full Size
( Source : HomeDepot.com )
( Source of Image : Pinterest )
1Drain The Toilet Tank
2Remove the Toilet Tank
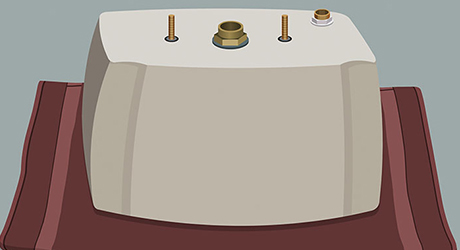
Remove the toilet tank and gently place it upside down on an old towel or rug.
3Install a New Flush Valve
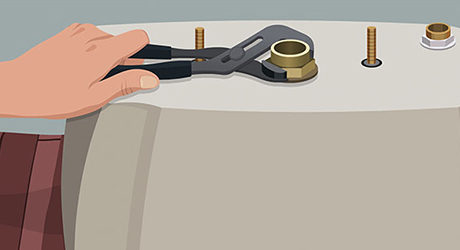
Screw the spud nut back onto the tailpiece of the new flush valve, tighten with a spud wrench or a pair of slip joint pliers, and place the soft spud washer over the tailpiece.
4Reinstall the Toilet Tank and Replace the flapper
( Source of Image : Pinterest )
1Drain The Toilet Tank
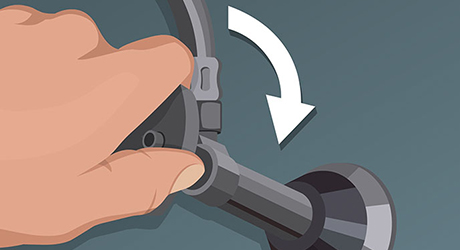
- Turn off the water at the shutoff valve and drain tank by flushing the toilet.
- Disconnect the water supply line with an adjustable wrench.
- Unscrew the tank bolts using a screwdriver and an adjustable wrench.
2Remove the Toilet Tank
Remove the toilet tank and gently place it upside down on an old towel or rug.
3Install a New Flush Valve
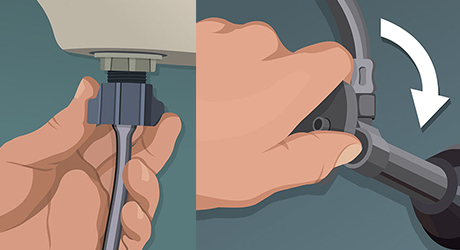
- Unscrew the spud nut with a spud wrench or a pair of slip joint pliers and remove the old flush valve.
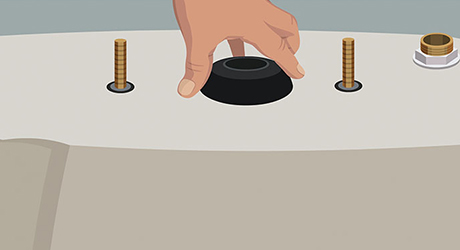
- Slide the cone washer onto the tailpiece of the new flush valve - the beveled side of the cone washer should point toward the end of the tailpiece.
- Insert the flush valve into the tank opening so that the overflow pipe faces the fill valve.
Screw the spud nut back onto the tailpiece of the new flush valve, tighten with a spud wrench or a pair of slip joint pliers, and place the soft spud washer over the tailpiece.
4Reinstall the Toilet Tank and Replace the flapper
- Reinstall the toilet tank and connect water supply line.
- Replace the flapper and reconnect the refill tube to the top of the overflow tube.
- Turn on the water and check for leaks.